by Docs Industries | May 9, 2016

Required tools and fasteners: ODM, ODM375, ODM916, TE-12, Torque Wrench, 3/8” Wedge Anchor, HOCL-45 Angle Clip, ceiling wire.
Step 1. Drill a 3/8” hole into the concrete ceiling using an ODM (Overhead Drill Machine) fitted with an ODM375 3/8”x 3.325” HALT bit.
Step 2. Remove the ODM375 HALT bit and insert an ODM916 SDS Plus 9/16 ” socket adapter, set the hammer drill to hammer only.
Step 3. Insert a 3/8” wedge anchor with a HOCL-45 angle clip prettied to ceiling wire into the ODM916 socket adapter.
Step 4. Raise the ODM up to the hole and insert the wedge anchor using the hammer function of the hammer drill.
Step 5. Use a TE-12 extension pole equipped with a LMP 9/16 Hex Plug to tighten the 9/16” nut on the wedge anchor to the appropriate torque using a torque wrench (Usually 25 ft/lbs).
by Docs Industries | Aug 12, 2015
 Inspiration for this tool came from watching a friend pre-wrap thousands of wires onto purlin clips, day after day in his shop. I thought to myself, there has got to be a faster and easier way to attach ceiling wire onto joists without the hassle of having to pre-wrap the wire.
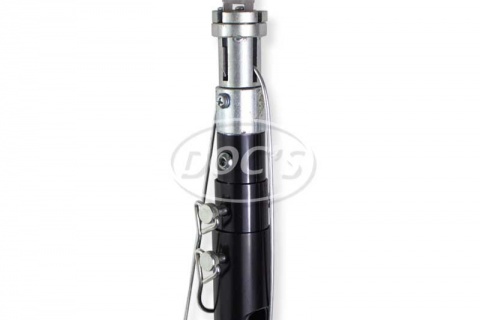
Our solution is the PurlinMaster, a multi-purpose pole tool that allows you to install a purlin clip and then wrap ceiling wire to the clip using the same tool, all from the safety of the ground. This effectively eliminates the need for costly scaffolding and scissor lifts. No longer will you have to purchase and haul around messy pre-wrapped ceiling wire. Instead, hang and wrap on an as-needed basis.
The PurlinMaster is actually part of a proprietary system from Doc’s Industries Inc., which offers its own line of purlin clips designed to work with the PurlinMaster as well as traditional installation tools.
Past installation systems required the ceiling wire to be wrapped onto the clip before installation. The PurlinMaster system represents a major innovation in the installation of ceiling wire to purlin joists. It makes installing purlin clips as easy as installing ceiling wire with an eye lag screw. An added benefit to this tool is that the clip will not “pop off” as the clip is safely protected inside the head during installation.
The concept behind the PurlinMaster is a unique twist on the traditional eye lag pole, a tool that has been utilized by acoustical ceiling contractors for decades. In fact, the PurlinMaster even comes with an interchangeable head that converts the tool into a standard eye lag pole in seconds. This allows you switch from installing purlin clips to installing wood screws at a moment’s notice. There are several other interchangeable heads available for hanging threaded rod and jack chain, in addition to many other applications (sold separately).
The PurlinMaster requires the use of Doc’s™ proprietary purlin clips. Take a moment to watch the video found in the link below and you will see how easy it is to hang ceiling wire from z purlin or bar joists using this tool. http://www.purlinmaster.com
The PurlinMaster works with Doc’s™ ADOC14 “Z” purlin clip as well as Doc’s™ VOH14 “C” purlin clip. These clips install easily and are compatible with traditional installation tools like the Caddy® VAFT, Ramset® J-Master & Doc’s™ HOIT-AL tools.
Installation is completed in a handful of easy steps. Start by inserting a clip into the head of the PurlinMaster. Then thread the ceiling wire through the clip. Stand in front of the purlin joist and position the clip above the joist. Pull down on the pole, locking the teeth of the clip onto the joist. Then walk forward, pushing up to release the clip. Lower the pole down a couple inches, trapping the wire inside the ring. Now simply twist the wire onto the clip, just as you would twist wire on to an eye lag screw. No need to pre-wrap the wire onto the clip!
by Docs Industries | Jan 21, 2015
Doc’s® LS-6-3660 style extension pole was designed for use with both Hilti’s DX 36 and Ramset’s D-60.
The D-45 is essentially the same tool as the D-60, only with a shorter pin capacity.
by Docs Industries | Jan 30, 2014
 In the United States, most suspended ceilings are fastened to poured concrete decks using a powder actuated tool attached to an extension pole. An extension pole allows the installer to stay on the floor and avoid dangerous ladders or expensive scissor lifts. They also cut down on time and improve efficiency.
There are several manufacturers of powder actuated tools used in the suspended ceiling industry: Hilti, Ramset, Powers, Simpson and Bluepoint. The Hilti DX 350 powder actuated tool (PAT) and its cousin the DX35 has been the standard of the industry for many years. Most of the other manufacturers began making similar tools (knock offs) when Hilti’s patent expired. The extension poles offered by these manufacturers can be more expensive than the powder actuated tool itself. Luckily there are other companies making extension poles. The Long Shooter brand of pole tools for instance has a proven track record of high quality and is available at a low cost.
Typically an extension pole consists of a fiberglass pole with a means to secure the PAT tool on one end and a trigger pull on the other. The installer has to be protected from shock in case an electrical conduit is pierced by the PAT nail. Therefore, PAT extension poles are usually made of fiberglass and have a dielectric coupling to withstand up to 10,000 volts.
Ceiling wires pre-wrapped to an angle clip and a concrete pin are available at some of the larger distributors. Pre-wrapped ceiling wire assemblies coupled with an extension pole allow a single worker to install 700 or more ceiling wires in an average day. Most contractors customize their pole tool by attaching a short section of electrical conduit or PVC pipe to the side of the pole. This is used to hold a number of ceiling wire assemblies to cut down on trips back and forth to re-stock.
Ramset’s Viper tool was developed specifically for the suspended ceiling industry in the US. Early versions of Ramset’s Viper tool did not require a trigger-pull mechanism. Instead, the tool was pressed against the ceiling and the impact or “BUMP” activated the tool. This “BUMP” feature allowed the tool to be place on a simple and inexpensive telescoping pole. The latest version of the Viper, the Viper4, requires a trigger pull mechanism and a special extension tool. The Viper 4 is not a “BUMP” tool.
Powers Fasteners makes a “BUMP” tool similar to the older versions of the Viper. Powers calls their tool the Sniper. Most fans of the “BUMP” tool are switching to the Sniper.
In summary, extension poles for powder actuated tools increase efficiency, improve safety and greatly reduce cost. There are videos on-line that demonstrate how PAT tools are mounted to extension poles, as well as how they’re used.
by Docs Industries | Jan 30, 2014
 Eye lag screws have long been used in commercial construction to provide an economical and fast way to hang things over head. If you need to suspend something from a wood or sheet metal ceiling, you should consider the eye lag screw.
The acoustical suspended ceiling industry uses eye lag screws almost exclusively to hang ceiling wires. They are economical and can be installed quickly and safely from the floor. These screws can be used in many other overhead applications. Such as hanging lights, signs, electrical cable, data communications cable (CAT5 and CAT6), HVAC ducts, electrical conduit, electrical trapeze, shielded cable and telephone wire to name a few.
Description and load limits:
The eye of the screw is a 3/16” hole punched in the flattened area. The flat end is used to twist the screw in. Screws designed for wood applications are about three inches long and have about an inch and a half of coarse threads that taper to a sharp point; here is no need to pre-drill a pilot hole. Pull out strengths vary with penetration and wood strength, but are usually more than the strength of the ceiling wire (600 pounds). Screws designed for sheet metal are case hardened and zinc plated. They may have a sharp point (for thinner gauges) but usually have a drill point. Pull strength in sheet metal varies with metal thickness. Typically the thinner gauges (22 gauge) are allowed loads of 120 pounds. The thicker gauges (18 gauge) are allowed loads of around 240 pounds.
Methods of installation:
Telescoping pole tools are available that will reach a ceiling of up to 30’. These eye lag extension poles allow you to drive in an eye lag screw and “twist” off the ceiling wire from the ground. There are installation videos available on-line that demonstrate how easy these poles are to use. The LagMaster Plus is the most versatile of the eye lag poles available for this purpose, as it can also be used to hang threaded rod, jack chain and spring steel clips from the ground. In some areas like California, eye lag screws pre-wrapped to ceiling wire are available. These pre-wrapped screws are used to make installation of ceiling wire even faster and to satisfy code requirements for hospitals, jails and schools.
When you are up next to the ceiling, you can use a drill driver jig to twist in the screw. This is the method used when you only have a few screws to install. This would typically require a ladder, scissor lift or scaffolding.
In summary, eye lag screws are surprisingly strong and versatile, whether you’re fastening to a wooden joist or metal decking. While designed to suspend ceiling wire, they can be used to hang just about anything within weight specs.
